Blog posts
Customize the Blog posts in the template:
1. Navigate to the "Template" section and locate the "Blog Posts" option within this section.

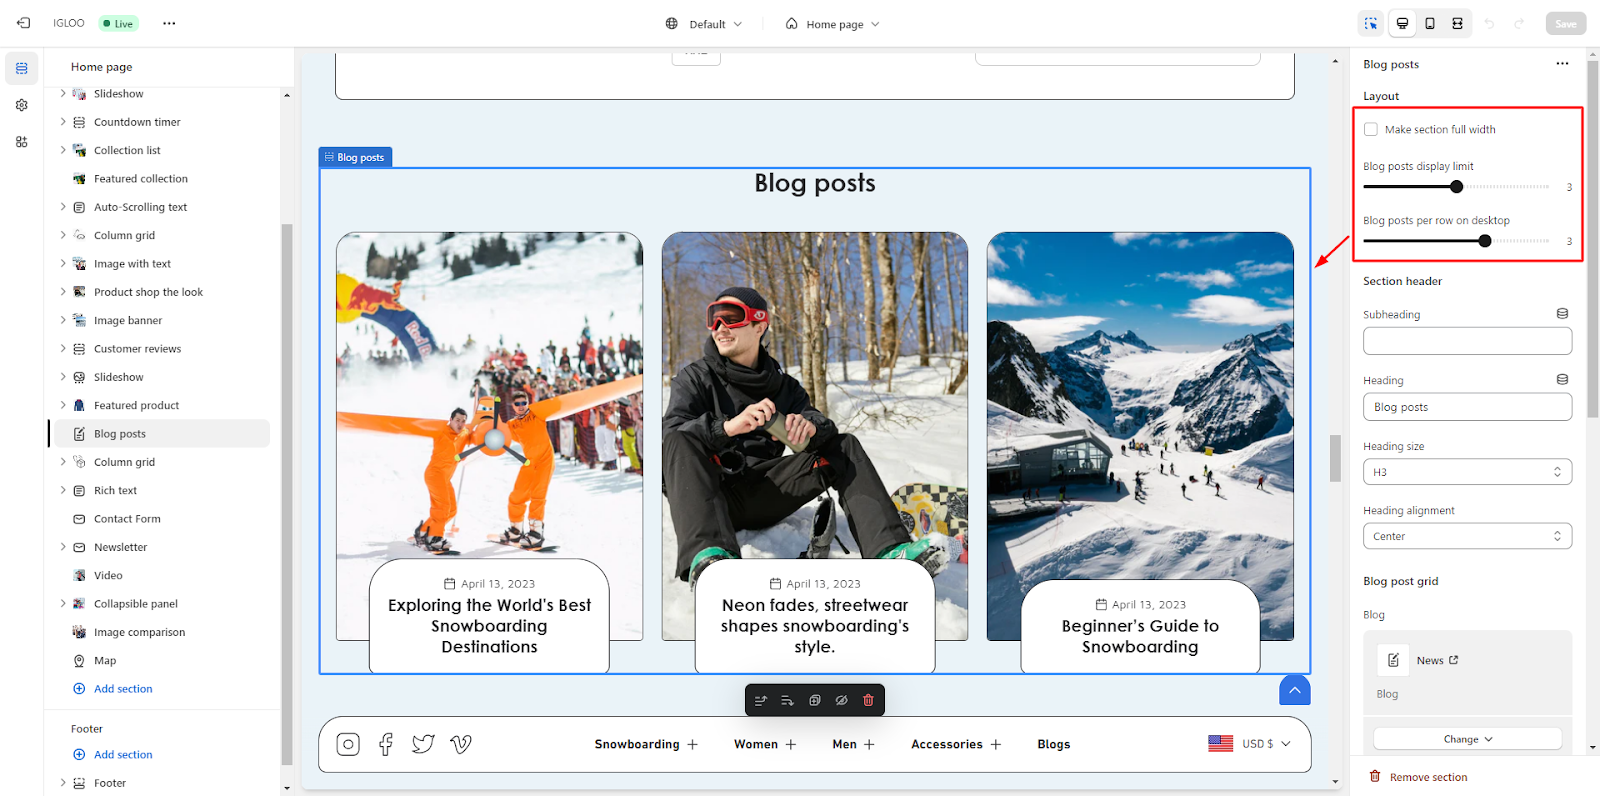
2. Click on the "Blog Posts" option. Upon clicking, you'll have access to customize the appearance of the blog posts on the right-hand side.
3. Within the "Customizations" section, you will find the option to expand the section to full width.
Just below that, there are range selectors for adjusting the Blog Posts Display Limit and the number of Blog Posts per row on the desktop view.

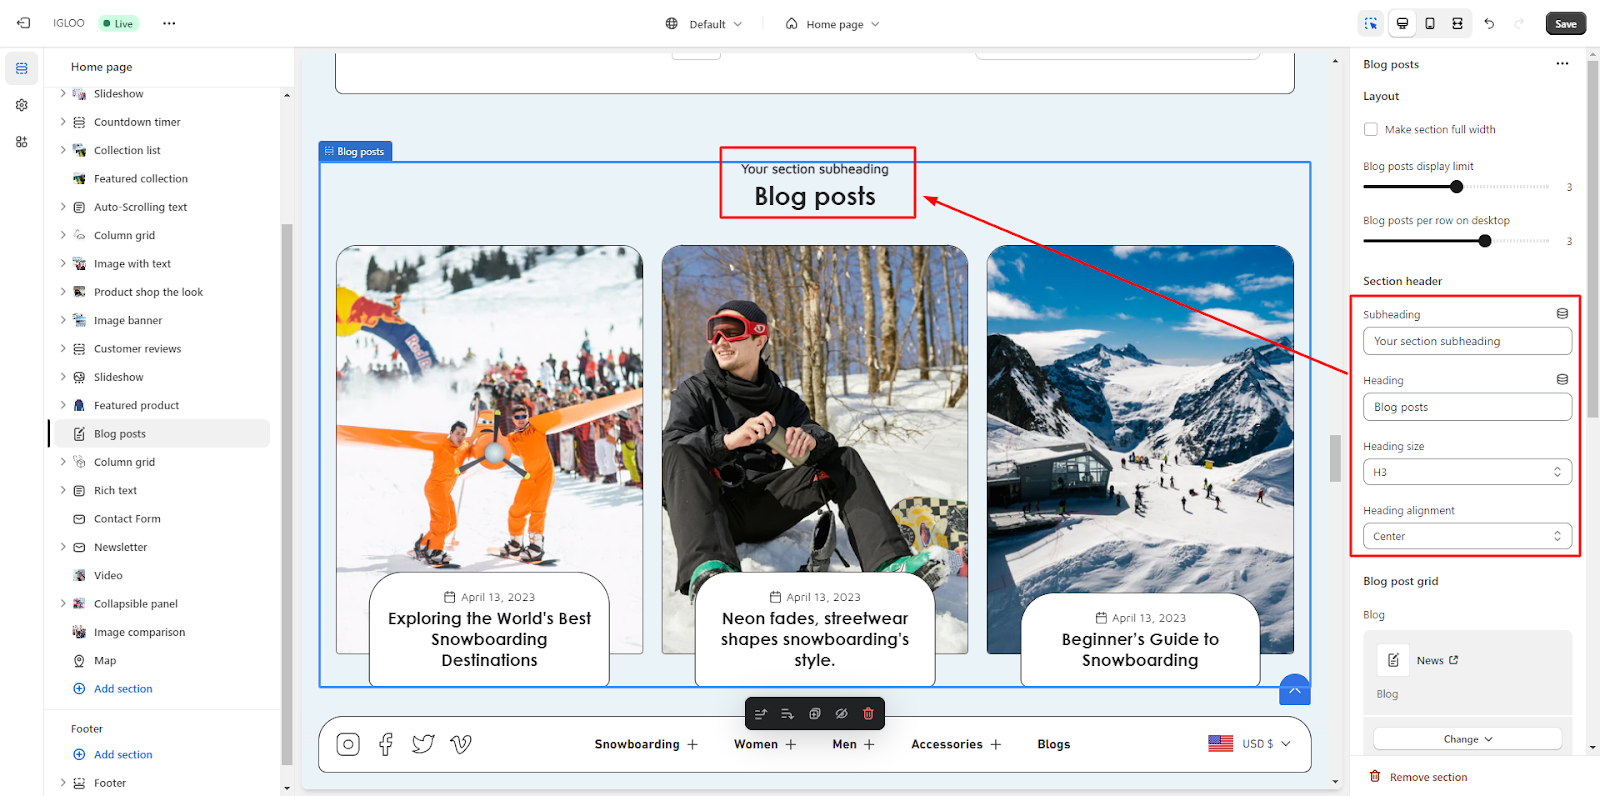
4. Moving forward, you can personalize the section header for this particular area.
This is where you have the ability to define the subheading and heading text. Additionally, you can modify the size of the heading and its alignment.

5. Furthermore, you have the option to choose a Color Scheme from the available choices.
There's also a checkbox to enable the display of the featured image along with the option to set the Featured Image height.
Adjacent to that, you can decide whether to display the date and author's name in the blog post.
You can also choose the preferred text alignment from the dropdown menu.
Lastly, you have the option to enable the "View All" button. This button becomes useful when the list of blogs exceeds the currently visible ones. You can also provide the link for the "View All" button.

Unable to locate the information you need?
Our support team is here to help! Feel free to reach out anytime – we're just a message away and ready to assist you with any questions you may have.


